

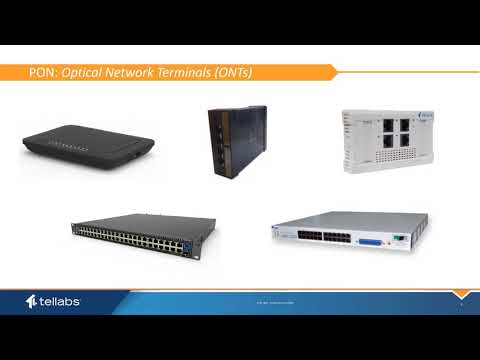
Adding new Optical Network Units (ONUs) to an existing network can be a complex but necessary process to expand and enhance connectivity. As an authority on the subject, I will guide you through the detailed steps involved in adding new ONUs to an existing network. So, let’s dive right in!
1. Assess Network Capacity and Requirements:
Before adding new ONUs, it is crucial to assess the current network capacity and determine the requirements for expansion. This involves evaluating the available bandwidth, network infrastructure, and potential demand for additional services. Understanding these factors will help you plan effectively and ensure a seamless integration of new ONUs.
2. Conduct Site Surveys:
Once the network assessment is complete, conducting site surveys becomes essential. Site surveys involve physically inspecting the locations where new ONUs will be installed. This step helps identify any potential challenges, such as the availability of power sources, space limitations, or environmental factors that may impact installation. By thoroughly evaluating the site, you can proactively address any issues that may arise during the installation process.
3. Design the Network Layout:
Based on the network assessment and site surveys, it’s time to design the network layout. This entails determining the optimal placement of new ONUs, considering factors such as distance from the central office, signal strength, and network topology. A well-designed network layout is crucial for efficient connectivity and minimizing signal degradation.
4. Procure Necessary Equipment:
With the network layout designed, you will need to procure the necessary equipment for adding new ONUs. This includes acquiring the ONUs themselves, along with any additional hardware or cables required for installation. It is important to ensure compatibility between the new ONUs and the existing network infrastructure to avoid any compatibility issues.
5. Configure and Install ONUs:
Once the equipment is ready, the next step is to configure and install the new ONUs. This involves programming each ONU with the appropriate settings and parameters to connect it to the existing network. The configuration process may vary depending on the specific network technology being used, such as GPON (Gigabit Passive Optical Network) or EPON (Ethernet Passive Optical Network). Properly configuring the ONUs is vital for seamless integration into the network.
6. Test and Verify Connectivity:
After the installation, thorough testing and verification of connectivity are crucial to ensure that the new ONUs are functioning properly. This involves conducting various tests, such as signal strength measurements, network performance evaluations, and service provisioning tests. By performing these tests, you can identify and resolve any issues or inconsistencies before deploying the new ONUs to end-users.
7. Document and Update Network Documentation:
As you add new ONUs to the existing network, it is essential to maintain accurate documentation of the changes made. This includes updating network diagrams, configuration files, and any other relevant documentation. Proper documentation ensures that future troubleshooting, maintenance, or expansion activities can be carried out efficiently.
8.
Step-by-Step Guide: Adding a New Router to Your Existing Network Made Easy!
Step-by-Step Guide: Adding a New Router to Your Existing Network Made Easy!
So, you’re looking to add a new router to your existing network? No worries, we’ve got you covered! Adding a new router to your network can seem daunting, but with our step-by-step guide, it’s a breeze. Here’s everything you need to know to make the process smooth and simple:
1. Assess your network needs: Before adding a new router, it’s important to assess your network needs. Are you experiencing slow internet speeds? Do you have dead zones in your home? Identifying the issues will help you choose the right router for your needs.
2. Choose the right router: Once you’ve identified your network needs, it’s time to choose the right router. Consider factors like speed, range, and compatibility with your existing devices. Look for routers that offer features like dual-band technology and advanced security options.
3. Disconnect your current router: Before adding the new router, you’ll need to disconnect your current one. This can usually be done by unplugging the power source and removing any Ethernet cables connected to it.
4. Connect the new router: Now it’s time to connect the new router. Start by plugging it into a power source and connecting it to your modem using an Ethernet cable. Follow the manufacturer’s instructions for setting up the router, which may include configuring the network settings and creating a unique password.
5. Configure the new router: Once the new router is connected, you’ll need to configure it. This typically involves accessing the router’s web interface through a web browser. Enter the router’s IP address (usually printed on the router itself) into the browser’s address bar, and follow the on-screen instructions to set up your network.
6. Test your network: After configuring the new router, it’s important to test your network to ensure everything is working properly. Check your internet connection speed, connect your devices to the new router, and test the Wi-Fi signal strength throughout your home. Make any necessary adjustments to optimize your network performance.
7. Secure your network: Finally, don’t forget to secure your network. Change the default password for your router’s administration settings, enable encryption (WPA2 is recommended), and consider enabling features like guest networks and parental controls for added security and convenience.
And there you have it – a step-by-step guide to adding a new router to your existing network. By following these simple steps, you’ll be able to enhance your network performance and enjoy a seamless internet experience. Happy networking!
Step-by-Step Guide: Adding a Wireless Access Point to Your Existing Network for Enhanced Connectivity
Step-by-Step Guide: Adding a Wireless Access Point to Your Existing Network for Enhanced Connectivity
Are you looking to improve the connectivity of your existing network? Adding a wireless access point (WAP) can be the solution you’re seeking. In this step-by-step guide, we will walk you through the process of adding a WAP to your network, ensuring enhanced connectivity for all your devices.
1. Assess your network requirements: Before you begin, it’s important to determine your network requirements. Consider factors such as the size of your space, the number of devices you need to connect, and the desired coverage area. This will help you choose the right WAP for your needs.
2. Choose the right WAP: Once you have assessed your network requirements, research and select a wireless access point that meets your needs. Look for features such as dual-band support, fast data transfer rates, and compatibility with your existing network equipment.
3. Plan the WAP placement: Proper placement of the WAP is crucial for optimal coverage and performance. Identify an area in your space where the WAP can be centrally located and have a clear line of sight to the devices you want to connect. Avoid placing it near obstructions such as walls or metal objects that can interfere with the signal.
4. Connect the WAP to your network: Start by connecting the WAP to your existing network. This can typically be done by connecting an Ethernet cable from the WAP to an available LAN port on your router or switch. Follow the manufacturer’s instructions for any additional setup steps, such as configuring the WAP’s IP address.
5. Configure the WAP settings: Once the physical connection is established, access the WAP’s settings through a web browser. This will allow you to configure various settings, such as the network name (SSID), security options, and wireless channel. It is recommended to enable encryption, such as WPA2, to secure your wireless network.
6. Test and optimize: After configuring the WAP, it’s important to test the connectivity and optimize performance. Connect your devices to the newly added WAP and check if they are able to connect to the network seamlessly. If you experience any issues, troubleshoot by adjusting settings or contacting the manufacturer’s support.
7. Expand your network: If you have a large space or need to extend the coverage area, consider adding additional WAPs. This can be done by repeating the previous steps for each new WAP, ensuring they are all connected to your existing network and configured properly.
By following this step-by-step guide, you can easily add a wireless access point to your existing network and enjoy enhanced connectivity for all your devices. Remember to assess your network requirements, choose the right WAP, plan the placement, connect and configure the WAP, and test and optimize for the best results.
Mastering Network Integration: A Step-by-Step Guide to Adding One Network to Another
Mastering Network Integration: A Step-by-Step Guide to Adding One Network to Another is a comprehensive resource that provides a detailed process for adding new ONUs (Optical Network Units) to an existing network. This step-by-step guide offers valuable insights into the critical aspects of network integration, ensuring that readers gain a thorough understanding of the topic.
1. Assessing Network Requirements:
Before adding new ONUs to an existing network, it is crucial to assess the network requirements. This involves evaluating factors such as bandwidth needs, network capacity, and future scalability. By understanding the specific needs of the network, you can determine the appropriate integration strategy and ensure seamless network expansion.
2. Planning and Designing:
Once the network requirements are assessed, the next step is to plan and design the integration process. This entails creating a detailed roadmap that outlines the necessary steps, equipment, and configurations required for successful network integration. It is essential to consider factors like network topology, IP addressing, VLAN segmentation, and security protocols during the planning phase.
3. Configuring Network Elements:
After the planning phase, the focus shifts to configuring the network elements. This involves setting up the necessary hardware components, such as routers, switches, and ONUs, and establishing the appropriate network protocols and settings. Configuring the network elements ensures proper communication and connectivity between the new ONUs and the existing network infrastructure.
4. Testing and Verification:
Once the network elements are configured, thorough testing and verification are essential to ensure the successful integration of the new ONUs. This includes conducting connectivity tests, performance evaluations, and troubleshooting any potential issues. Testing and verification help identify and resolve any network discrepancies or compatibility problems before fully integrating the new ONUs into the network.
5. Monitoring and Maintenance:
Network integration is an ongoing process that requires continuous monitoring and maintenance. After adding new ONUs to the existing network, it is crucial to monitor network performance, identify any bottlenecks or vulnerabilities, and implement necessary maintenance measures. Regular monitoring and maintenance ensure optimal network functionality and minimize disruptions.
In conclusion, Mastering Network Integration: A Step-by-Step Guide to Adding One Network to Another is a valuable resource for anyone involved in network integration. By following the detailed process outlined in the guide, readers can successfully add new ONUs to an existing network while ensuring seamless connectivity and optimal performance.
Adding new ONUs to an existing network is a crucial process that requires careful planning and execution. By following the correct steps, network administrators can ensure a smooth integration and optimal performance of the new ONUs.
**One frequently asked question is: What is the first step in adding new ONUs to an existing network?** The first step is to identify the type of network architecture and determine the compatibility of the new ONUs with the existing network equipment. This involves reviewing the network documentation and consulting with the manufacturer or service provider if necessary.
**Another common question is: How do I physically connect the new ONUs to the network?** The physical connection can vary depending on the network infrastructure. In most cases, it involves connecting the ONUs to the existing network switch or router using Ethernet cables. It is important to ensure that the cables are properly connected and that the ONUs are powered on.
**A question often asked is: How do I configure the new ONUs to work with the existing network?** Once the ONUs are physically connected, they need to be configured to communicate with the network. This typically involves accessing the ONUs’ management interface through a web browser and entering the necessary network settings, such as IP address, subnet mask, and gateway. The specific configuration steps may vary depending on the manufacturer and model of the ONUs.
**One more frequently asked question is: How do I test the new ONUs to ensure they are functioning correctly?** After the ONUs are connected and configured, it is important to perform thorough testing to ensure their proper functionality. This includes checking for network connectivity, verifying internet access, and testing any specific services or applications that the ONUs are intended to support. Any issues or errors should be addressed promptly to avoid disruptions to the network.
In conclusion, adding new ONUs to an existing network is a systematic process that involves identifying network compatibility, physically connecting the ONUs, configuring them to work with the network, and testing their functionality. By following these steps, network administrators can successfully expand their network and accommodate the needs of additional users or devices.


Adding new ONUs to an existing network? Aint nobody got time for that! Just hire a tech guru and be done with it!
Who needs a step-by-step guide? Just hire a tech expert and save yourself the headache!
I believe adding new devices to a network can be challenging yet rewarding. Its like solving a tech puzzle – frustrating yet satisfying!
I think adding new devices to an existing network can be a pain sometimes, but with the right steps, its like a walk in the park!
I think adding new devices to a network can be a hassle. What if they made a guide for adding a smart fridge next? 😂
I disagree with the articles suggestion to add a new router for better connectivity. Mesh network systems are more efficient and user-friendly!
I believe adding new ONUs to an existing network shouldnt be rocket science. Whos with me on simplifying this process? Lets make networking easy!
I think the process of adding new devices to an existing network can be overwhelming. Its like a puzzle that requires patience and precision!